
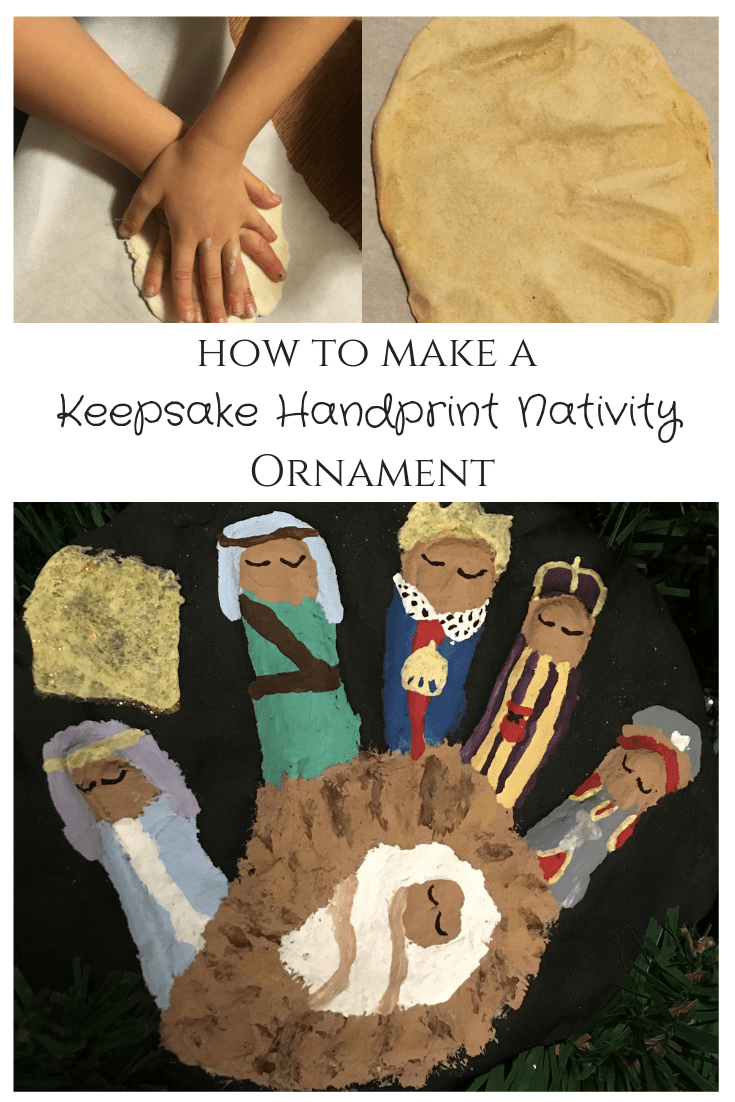
As part of getting ready for Christmas this year, we started making many (many!) salt dough ornaments, including this totally adorable handprint nativity ornament.
My kids love salt dough! And they love making things. (Like a dozen things every night after school. Seriously. We are running out of room for all the arts and crafts.)
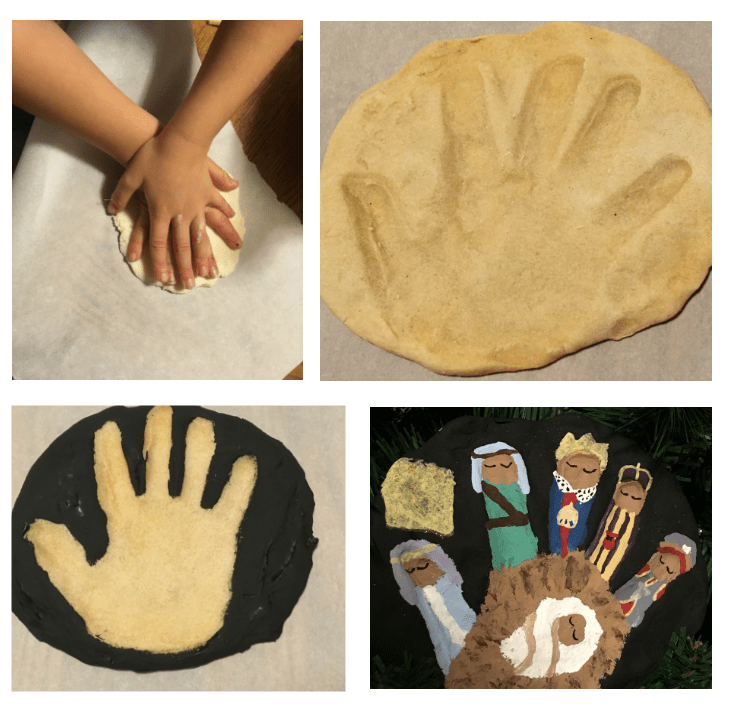
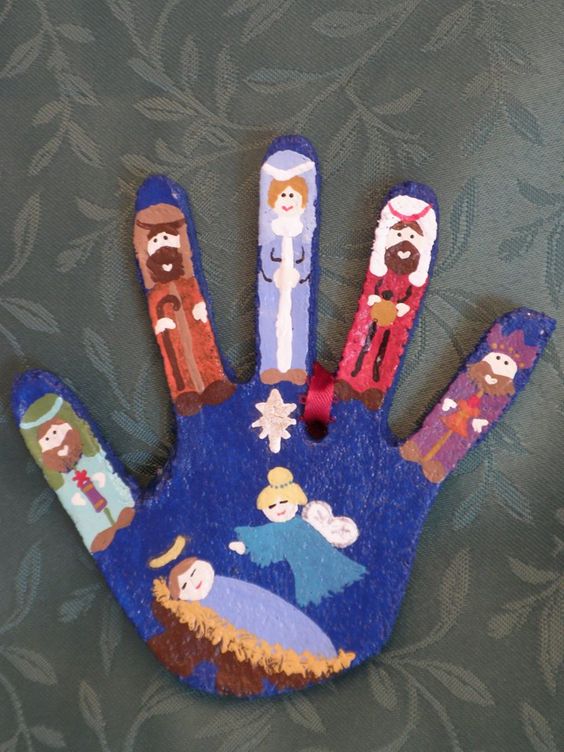
The littles helped by making the hand prints, and then I painted them with baby Jesus, Mary and Joseph, and 3 wise men.
These work really well as ornaments on the Christmas tree (just poke a hole in the top of your salt dough ornament with a straw before you bake it) or you can hang them on the wall or display them on a shelf.
How to Make a Salt Dough Nativity Handprint Ornament
- Make your salt dough. This involves mixing 1 cup of flour, 1/2 cup of salt, and about 1/2 cup of water together. Mix the flour and salt together first. Then add water and keep mixing until you get a dough-like consistency. It needs to be wet enough to stick together but not so wet that it sticks to your hands.
- Get your kiddos to press their hands into the dough, making handprints.
- Bake your salt dough at around 200 degrees Fahrenheit for about an hour. How long it takes will actually vary quite a bit depending on the size and the thickness of your salt dough. Keep checking on it every 10 or 20 minutes until it is hard, but not brown.
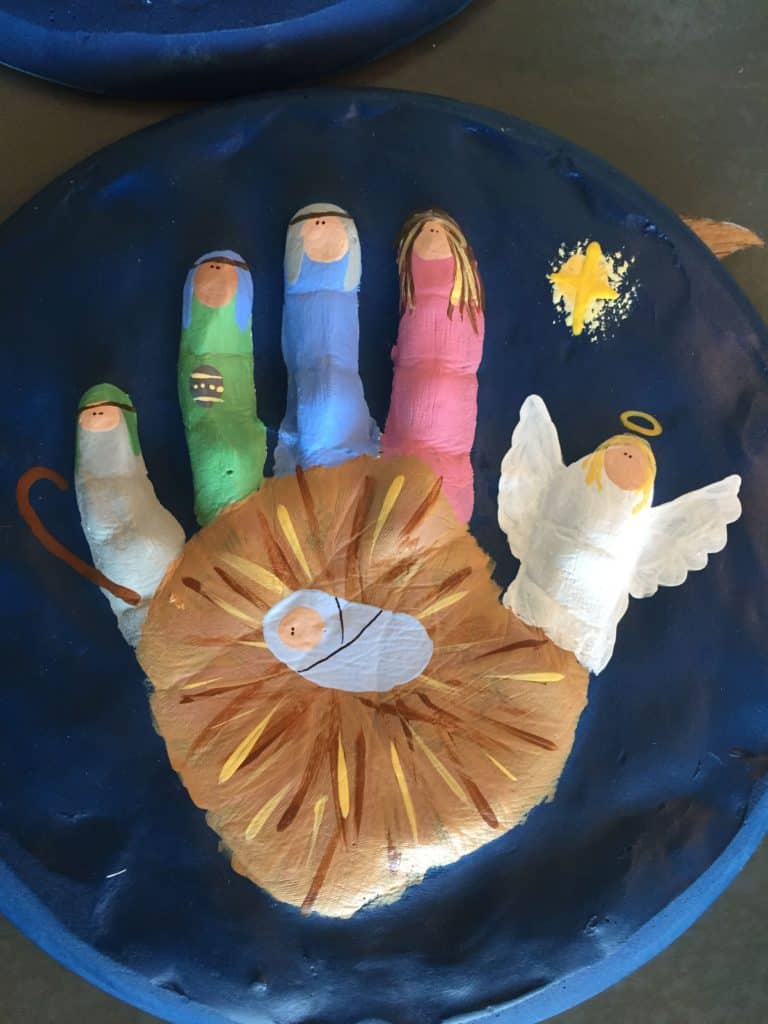
- Paint your nativity scene. We painted baby Jesus, Mary and Joseph, and 3 wise men. But I've also seen handprints that feature baby Jesus, Mary and Joseph, 1 wise man, 1 shepherd, and 1 angel.
How to Make Salt Dough | Simple 3-Ingredient Recipe
Making salt dough is super simple, but does take a bit of trial and error.
Salt dough is really hard to get wrong! If your dough is too dry, add more water. If your dough is too wet, add more flour.
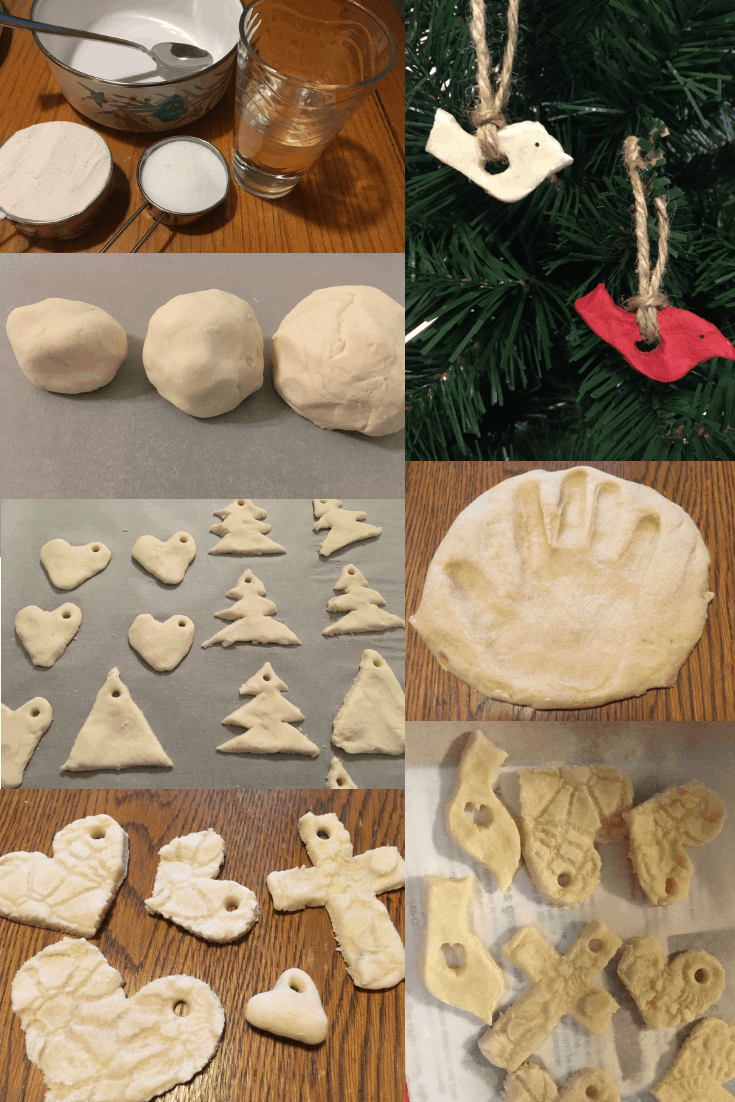
Mix together 1 cup of flour, 1/2 cup of salt, and about 1/2 cup of water. You may need a bit more or less water. What's important is getting the consistency right (not following the amounts of ingredients exactly).
Mix your dry ingredients first, and then add water until you get the consistency of dough.
Your dough should stick together. You don't want to have bits of flour left at the bottom. But you don't want your dough to be so wet that it sticks to your hands (and the table, and the baking sheet).
Shape your dough into its final shape. If you are making handprint nativity ornaments, then you will want to shape your dough into a big, flat circle, and have your kids press their hands into it to make handprints.
Bake your dough at about 200 degrees Fahrenheit. How long will depend on how big and thick your salt dough is. We baked our handprints for about an hour.
Check on your ornaments as they bake every 10 or 20 minutes (especially near the end). If they are hard when you tap them, then they are done. If they are still smushy in places, then they need to be baked more.
Nativity Scene Ideas
You can get as creative as you'd like with your nativity scene. You can add wise men, shepherds, and angels.
Here are some different nativity scenes that you can take inspiration from.
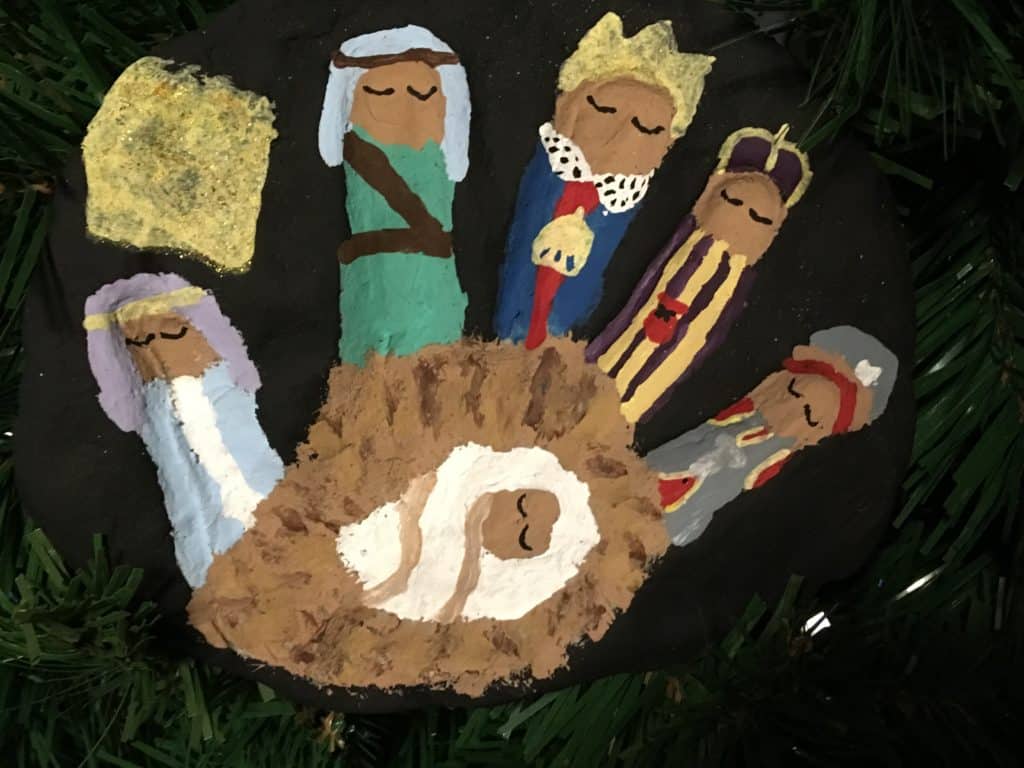
Our nativity scene handprint ornament.
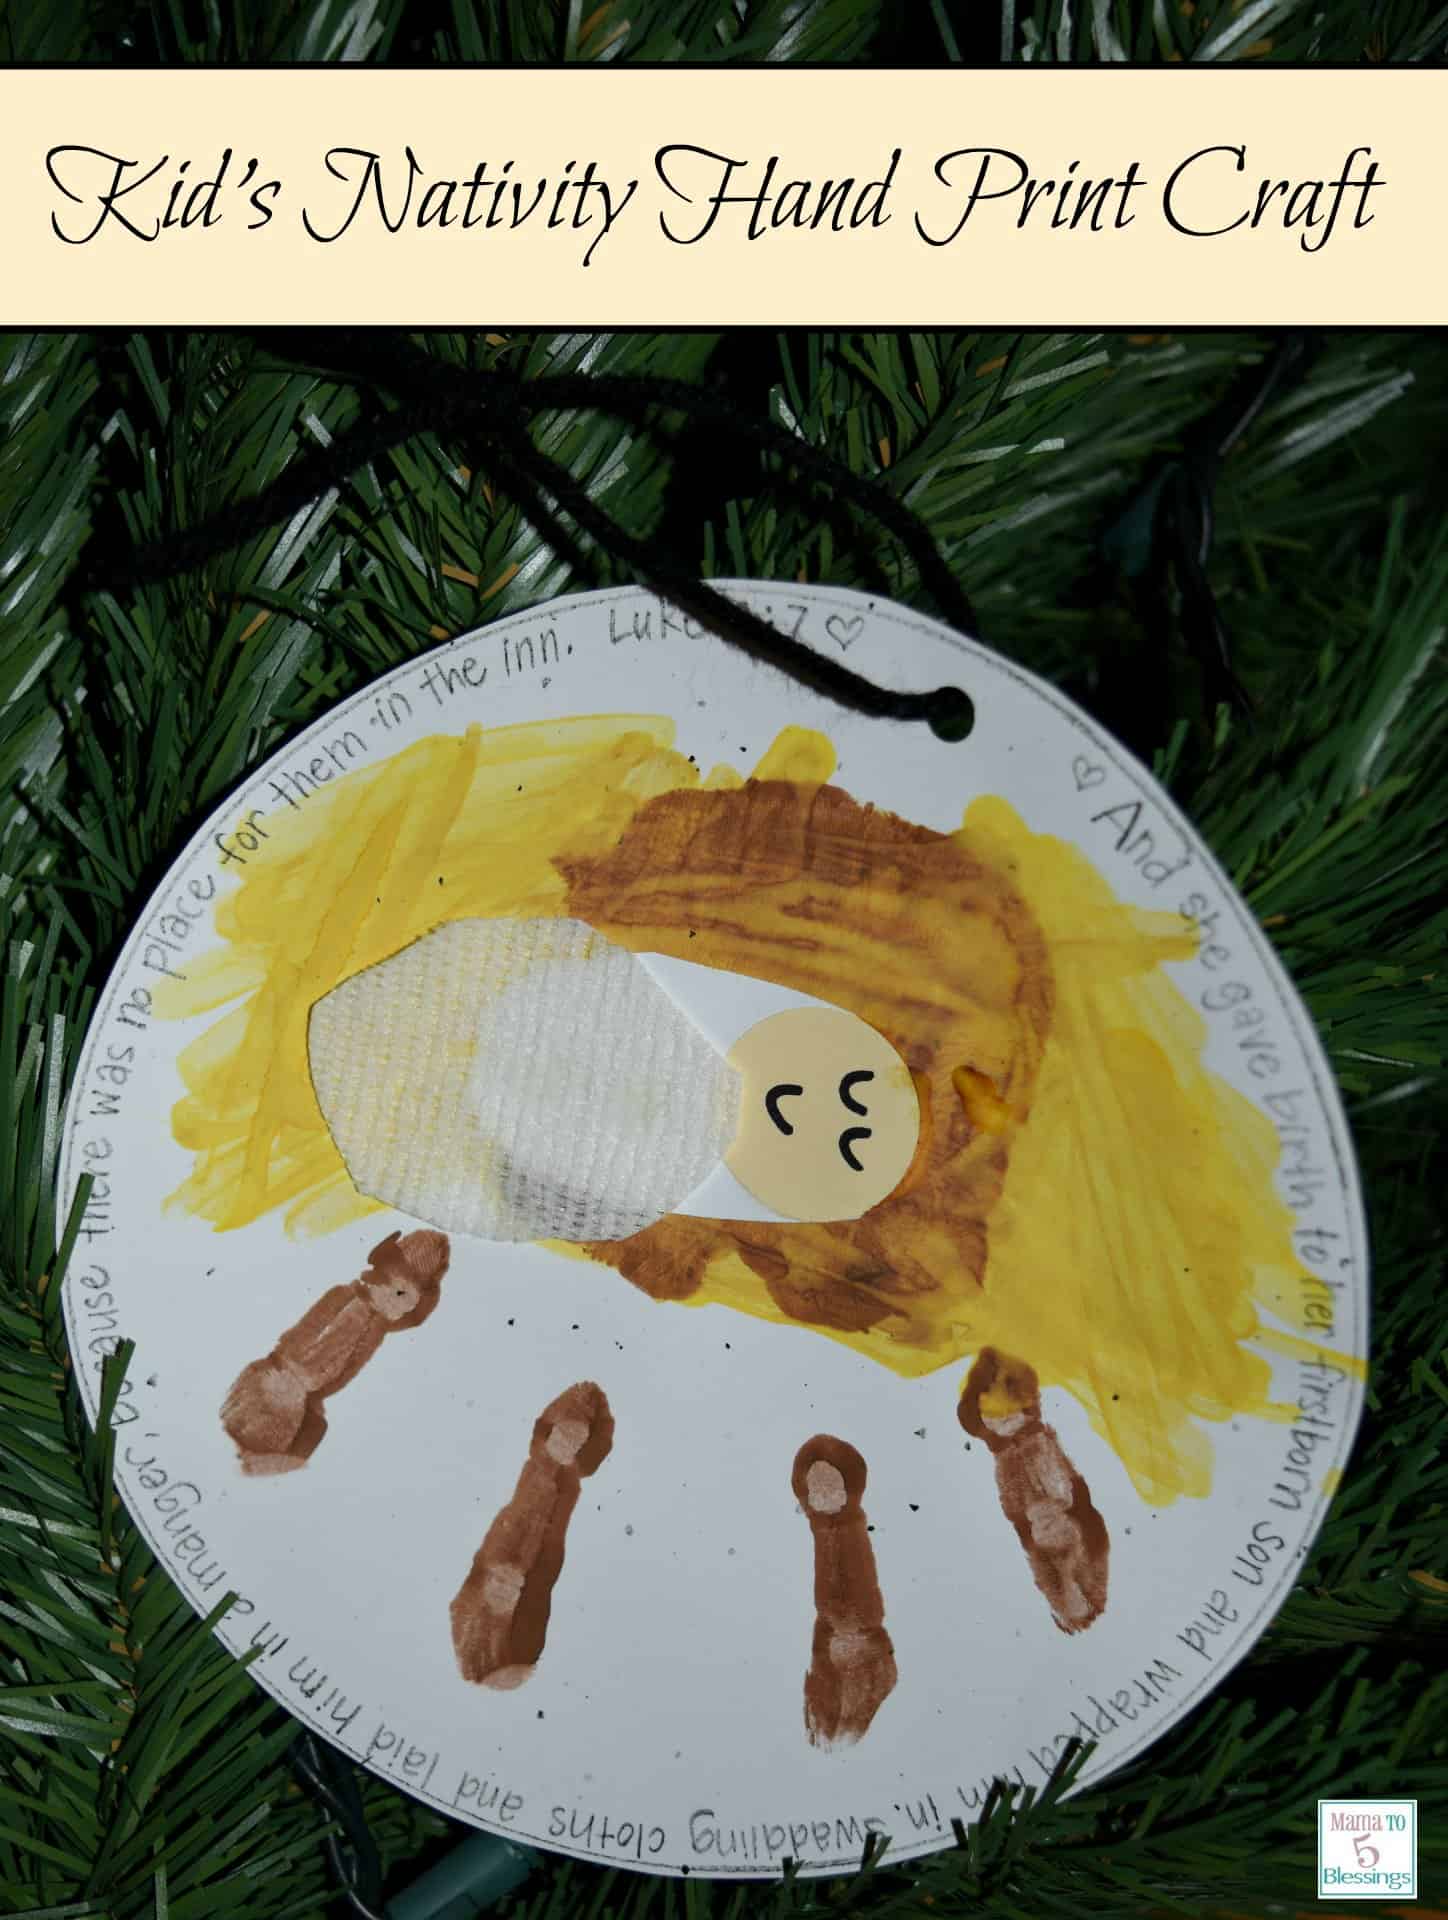
Simple Jesus-only nativity handprint ornament by Mama to 5 Blessings (this could be done in salt dough too, and painted by the kids).

Adorable nativity ornament featuring Mary, Joseph, baby Jesus, a wise man and an angel, by The Imagination Tree.
Another handprint ornament featuring 3 wise men, a shepherd, Mary, baby Jesus, and an angel via Pinterest.
Simple yet elegant handprint nativity ornament via Pinterest.