This post contains affiliate links. Using these links means I may earn a percentage of the purchase at no extra cost to you. As an amazon associate, I receive a percentage of qualifying purchases. View our disclosure policy here.
As a way to celebrate Advent this year, we decided to make our own batch of nativity story stones. (I’ve seen a few versions of these around, and they are all gorgeous!)
You can use nativity story stones to tell the story of Jesus’ birth – and get your kids to tell the story in their own words. We’re also planning on using these in conjunction with our Christmas Story Advent Calendar this year. This is a perfect family Christmas activity to do at home, or you can paint a set of story stones to use at church, in the classroom, for homeschool, or Sunday school.
Disclaimer: This post may contain affiliate links. By purchasing a product using my links, I earn a small commission at no extra cost to you. I only promote products that I find worthwhile and that I think will add value to your life. See our full affiliate disclaimer here.

What are Nativity Story Stones?
Nativity story stones are simply stones painted with characters and elements from the Christmas story. These stones make it super simple to engage kids with the story of Jesus’ birth: you can tell the story and introduce the stones at the right places. The kids can play with the characters and rearrange the pieces as they’d like.
These Christmas story stones also make it super simple for kids to start telling the story in their own words. The story stones can act as memory prompts as your littles and not-so-littles retell the Christmas story.
 Buy Now →
 How to Make Nativity Story Stones
These are super simple to make. You are just painting rocks to match the Christmas story. Using paint pens makes the painting go smoothly. And to make your Christmas story stones, you choose characters and other elements from the story of Jesus’ birth to paint on your stones and act as key events or story anchors. Read on for instructions on how to make your own set of nativity story stones.
What you need
- river rocks
- white paint
- paint brush
- paint pens
- a drawstring bag (or a box) to keep your story stones in
1. Gather your rocks.
We collected our river rocks from the waterfront near the church that I work at. (Field trip!) But if you don’t have a source of smooth stones nearby, you can easily find river rocks online or at a craft store.
2. Paint a base coat (optional).
We painted our rocks with a white base coat. This made them much simpler to paint with the different characters and elements from the Christmas story.
Let your base coat dry for a few hours to a day. The longer you let the rocks dry, the easier it will be to paint with the paint pens.
3. Outline all your drawings in pencil.
This step was hugely helpful! I am not a natural artist, but I found some examples of what I wanted to paint (Mary and Joseph, the wise men, baby Jesus, the inn….) and I drew a reasonable facsimile in pencil.
This makes it easier to erase mistakes if/when you make them. It also takes the stress out of painting (which is much harder to erase than pencil).
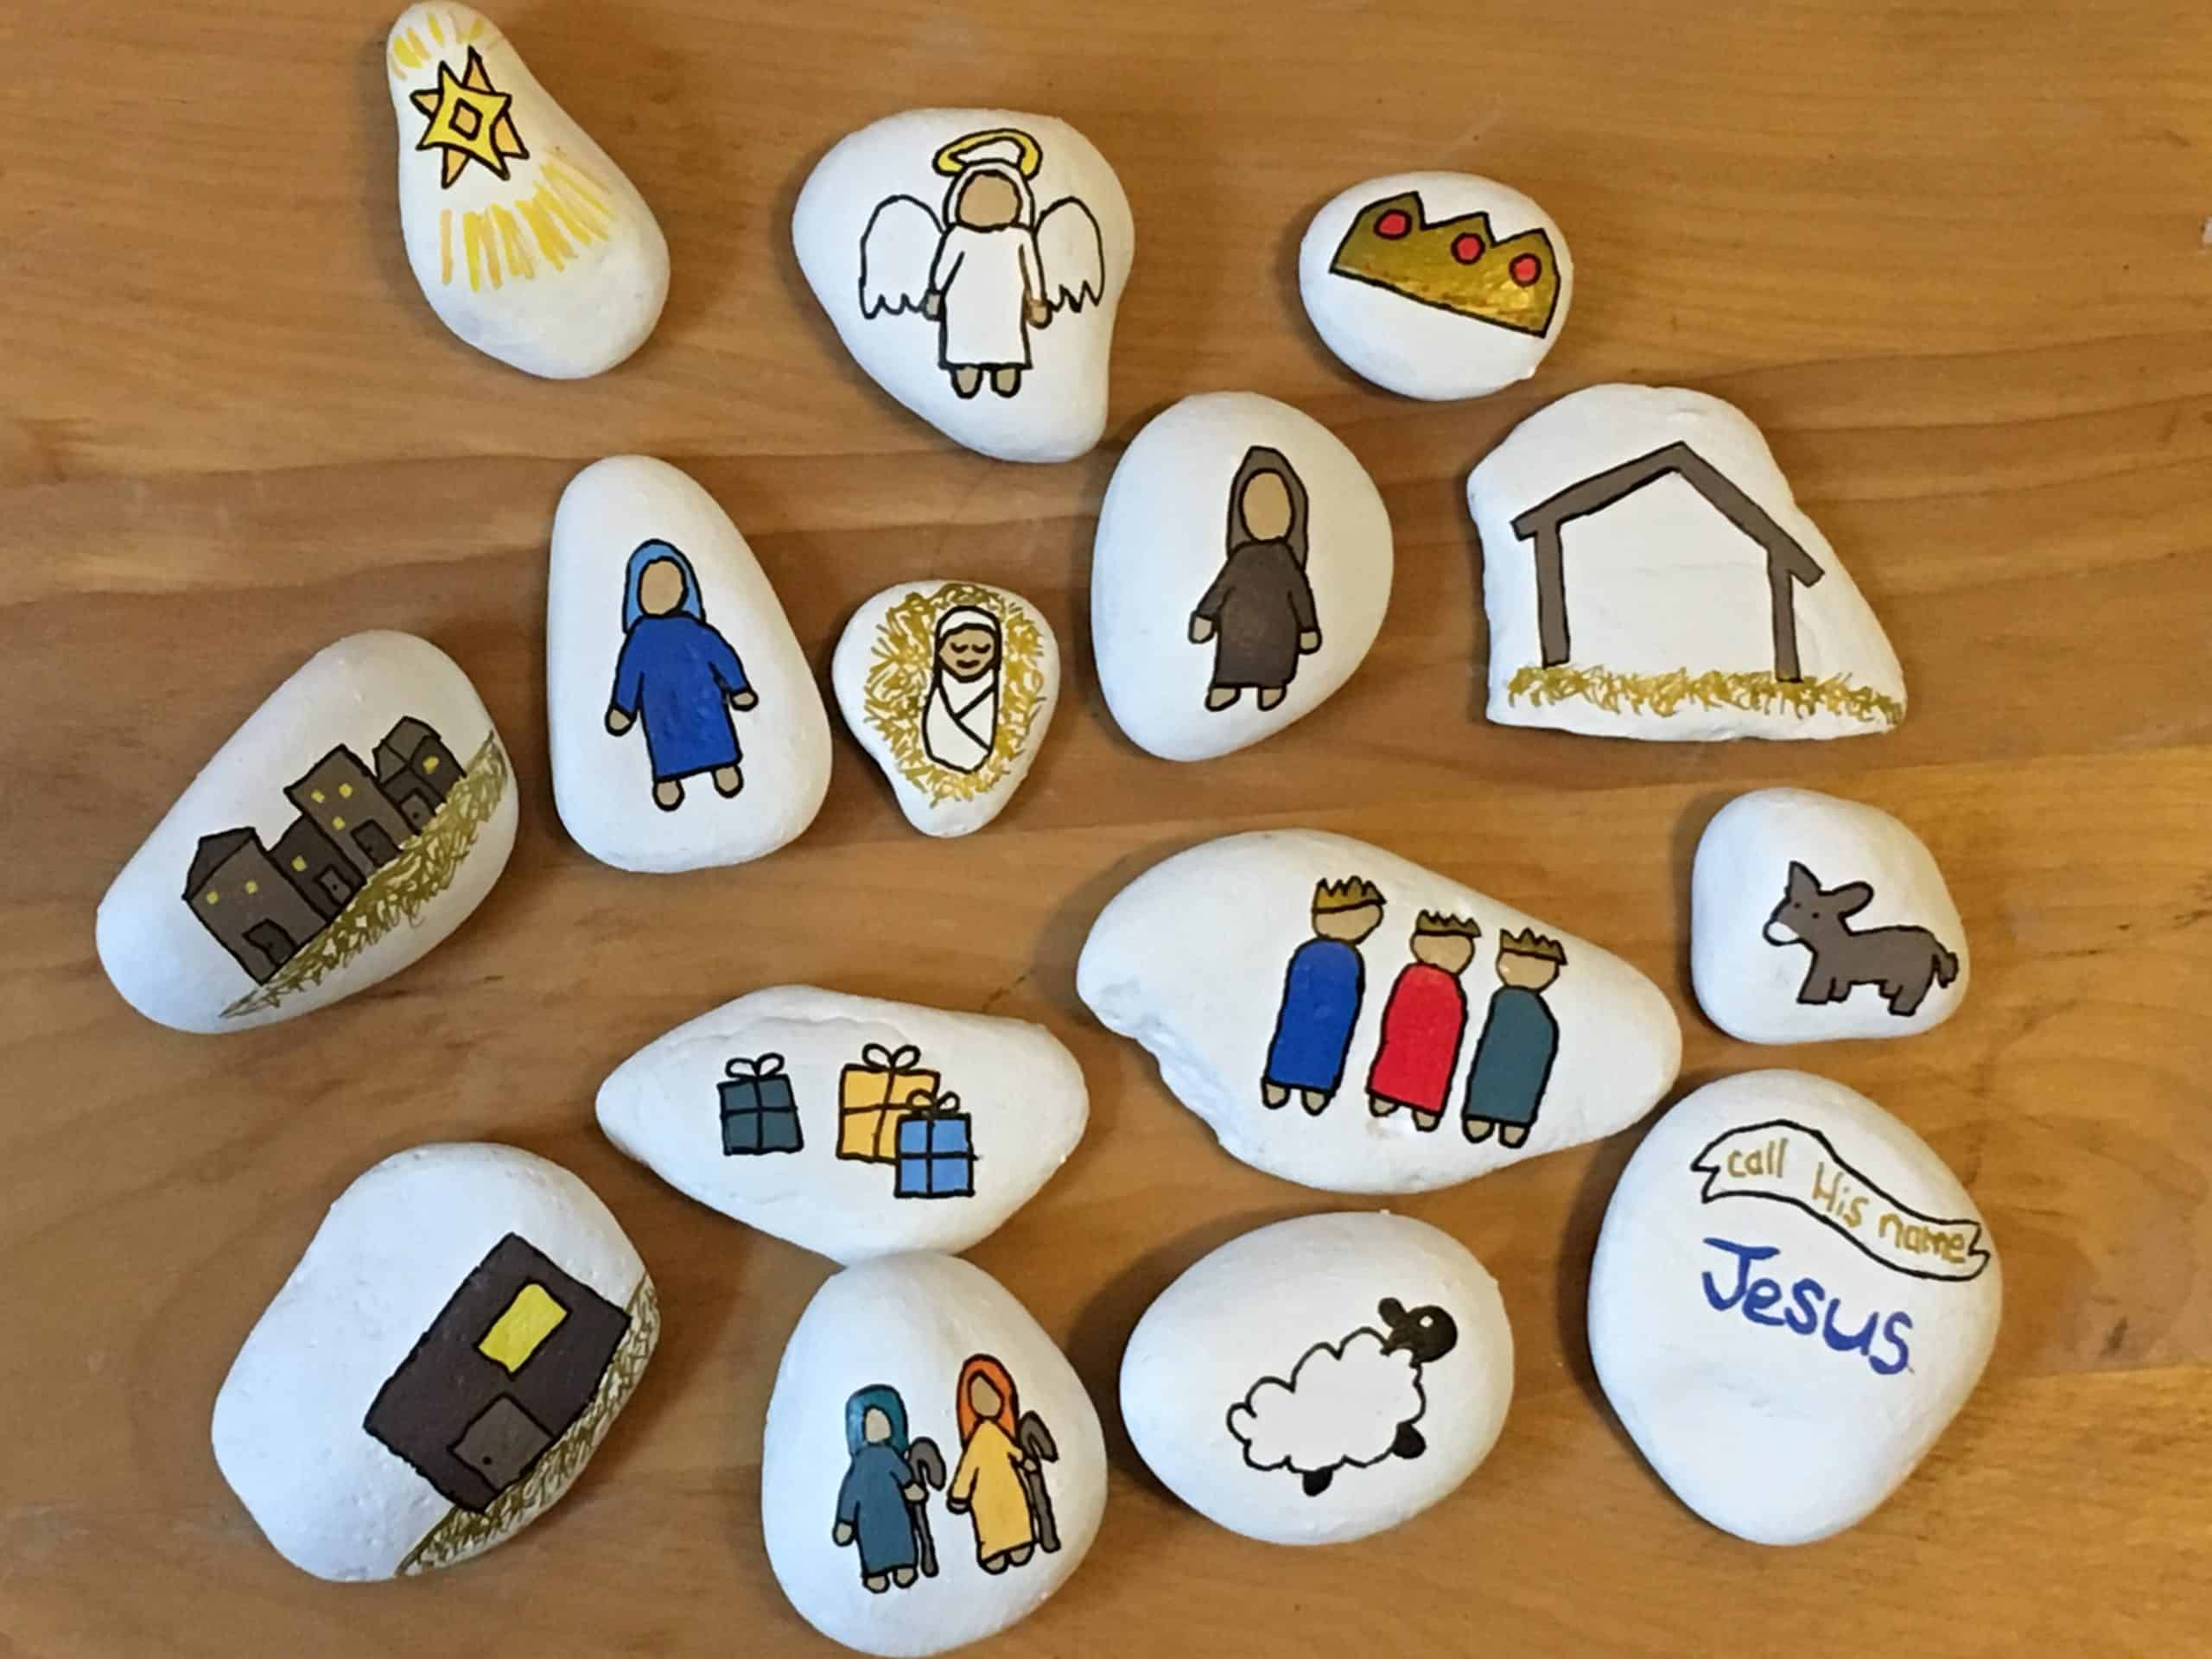
What we chose to draw
I’ve seen a few different sets of nativity story stones, and each of them use slightly different images.
We chose to have our story stones match our Christmas Story Advent Calendar. Each day of the calendar has it’s matching stone. That way, we can tell the Christmas story over the whole course of Advent and pull out a matching rock for each part of the story.
What’s on our story stones:
- angel
- Mary
- Joseph
- baby Jesus
- name of Jesus
- donkey
- sheep
- shepherds
- wise men
- crown
- Bethlehem (or a town, generally)
- the inn
- gifts (brought by the wise men)
- a star
- the manger
4. Fill in your outlines with paint.
Start with the main colours and worry about the outline later. This step is fairly simple, especially if you’ve drawn everything in pencil first.
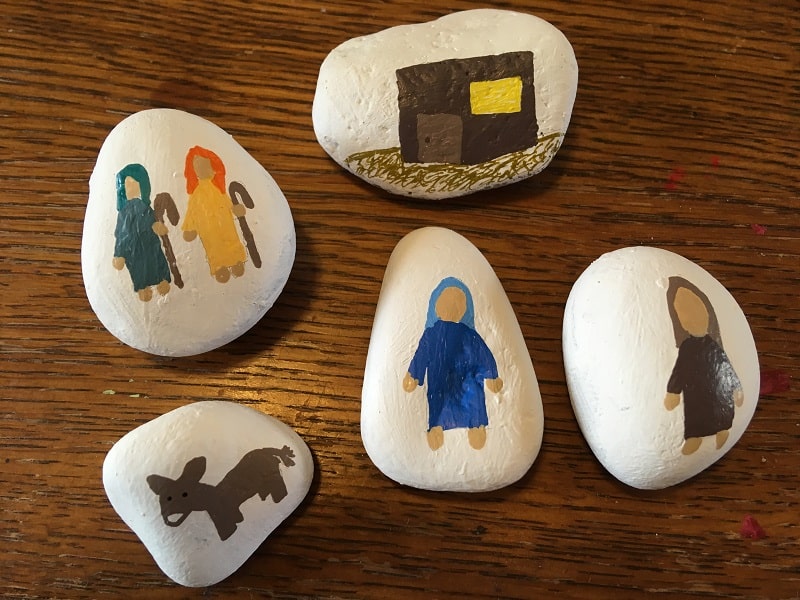
5. Outline everything with a black paint pen.
Once you’ve coloured everything in, you’ll want to outline it in black to make it crisp and polished.
Note: black paint pens work super well. Sharpies do not. (I tried a Sharpie, but it did not apply as smoothly as the paint pen, and the finishing spray smudged the Sharpie like crazy.)
6. Give your story stones a finishing spray.
Once everything is dry, use a spray to seal your paint. We like Modge Podge because it’s easy to use and versatile.
Done!
Ta-da. Story stones complete. Store them somewhere pretty, like in a drawstring bag or a decorative box.